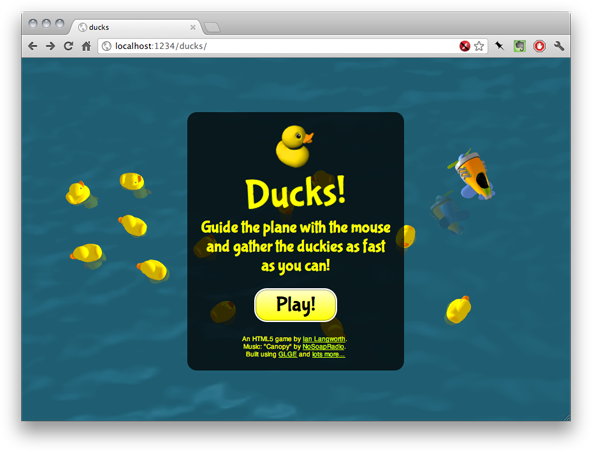
(Play the game or view the complete source.)
How difficult is it to build a WebGL-based browser game without any prior 3D experience? Very. Concepts such as normals and matrix transformations can be intimidating to someone who hasn’t recently passed a linear algebra exam. There’s a pile of knowledge required before you can get something more than a simple triangle to move on the screen. Luckily, frameworks such as GLGE abstract a lot of the hard stuff away and let budding game developers develop games more quickly.
Personally, I have passing familiarity with tools like Infini-D, Blender and Flash, so when I think of a 3D scene I imagine objects and groups of objects at coordinates in space, not meshes and normals and transformation matrices. Part of this experience was learning how to translate those artistic ideas into OpenGL concepts. GLGE helps a lot with doing that.
This is a three-part monologue on how I built a WebGL game with very little experience in programming 2D graphics. In four days I was able to turn an idea into a game with cute ducks that my friends’ 7-year-old daughter enjoyed.
The origin of the idea: COLLADA models
I started by spending some time with GLGE, which includes a handful of useful examples including demos of water and COLLADA models. The water demo was really cool, but once I saw the rubber duck COLLADA model it seemed obvious that the two needed to go together — “Why don’t I put the ducks in the water and make them bob around a little?”
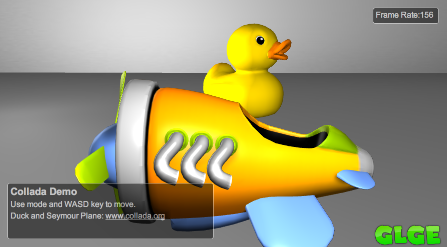
COLLADA is an open specification for 3D models that can include textures and animations. COLLADA files (extension .dae) are XML and can be imported and exported using common 3D modeling packages such as Blender and Google SketchUp. GLGE lets you import COLLADA documents almost seamlessly.
The COLLADA demo includes a cartoonish aeroplane with a spinning propeller animation. This made me remember flight simulators — planes have limited maneuverability and controlling their movement is a challenge. Catching ducks with a kinda-hard-to-maneuver plane seemed like it could be a simple, somewhat-fun game.
Getting started with GLGE
GLGE calls itself “WebGL for the lazy.” It provides a collection of classes to make management of the camera, scene and its objects much easier than if you were to write raw WebGL constructs. It also optimizes by reusing meshes and materials whenever it can.
If you want to dive in to the docs and examples immediately, perform the following. Clone or download & unzip [the GLGE project from GitHub][glge-github], run python -m SimpleHTTPServer from within the GLGE/ directory, and connect to http://localhost:8000/. This will give you fast access to the API and, unlike using file:///, will let you run the examples without triggering any cross-domain security hooplah.
Some of the terms might seem alien if you’ve never worked with OpenGL before, so here’s a primer. A mesh is a collection of polygons which make up the shape of an object. A polygon is a list of points, where each point is a three-tuple (or vector) of X, Y and Z coordinates. A material is applied to a mesh to give it the appearance of texture. A scene is what you’re looking at at any given moment — a tree of objects and object groups called the scene graph. You look at a scene through a viewport, whose direction, width and height is defined by the scene’s camera.
Making a scene
GLGE lets you initialize your scene in two ways: XML and JavaScript. The XML method is a declarative approach using XML which lets you define objects in the scene and the camera. You can give each element an ID which you can refer to within other parts of the XML document or within JavaScript later, much like document.getElementById() in an HTML DOM.
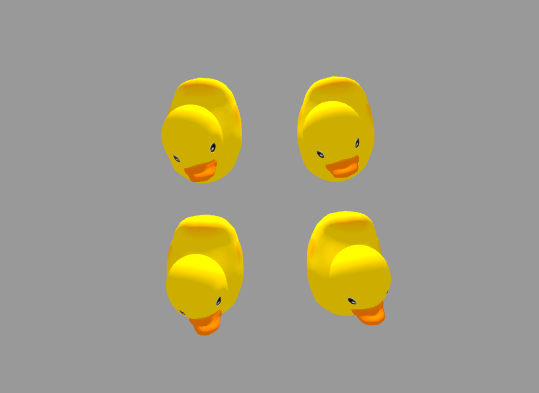
Creating a scene with XML is pretty easy, so let’s do that. Imagine a simple scene with four ducks spaced equally around the origin and the camera is pointing straight down at the ducks:
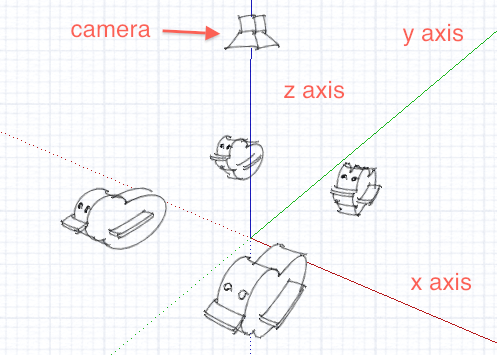
Here’s how that scene could be described in GLGE XML:
<?xml version="1.0"?>
<glge>

  <camera id="maincamera" loc_z="10" />

  <scene id="mainscene" camera="#maincamera"
         ambient_color="#fff" background_color="#999">

    <light id="mainlight" loc_y="5" type="L_POINT" />

    <collada document="duck.dae" loc_x="-1" loc_y="-1"
             rot_x="1.57" rot_y="4.71" scale=".01" />
    <collada document="duck.dae" loc_x="-1" loc_y="1"
             rot_x="1.57" rot_y="4.71" scale=".01" />
    <collada document="duck.dae" loc_x="1" loc_y="-1"
             rot_x="1.57" rot_y="4.71" scale=".01" />
    <collada document="duck.dae" loc_x="1" loc_y="1"
             rot_x="1.57" rot_y="4.71" scale=".01" />

  </scene>

</glge>
Straightforward, right? First, declare a camera positioned 20 units up on the Z axis — by default the camera looks straight down the Z axis. Next, declare a scene which contains a simple light source and puts four ducks on the ground.
The duck is imported from the COLLADA sample XML file duck.dae, which references an image duckCM.png to use as a texture. The COLLADA file contains everything needed to display the duckie including meshes and materials. Model assets aren’t always modeled the way you want, so each duck needs to be rotated on the X and Y axes to π/2 and 3π/2 radians, respectively. Rounding to two decimal places is good enough.
Each duck is placed on the corners of a square around the origin. The units used are completely arbitrary; I wasn’t able to find a clear description of what to use for units or how many or how few should be in a viewport. In the game I chose to assume that the ducks would be scattered across a 20 x 10 rectangle and I planned to figure out various window sizes and aspect ratios later.
XML for the scenes can be saved in a separate file, but when starting out with GLGE you’ll probably find it easier to embed the XML inside the HTML document using <script type="text/xml"> tags. For clarify, however, I’ll assume the XML is saved as a separate file, scene.xml.
Here’s a minimal HTML5 page which will render the scene:
<!doctype html>
<html>
  <body>

    <canvas id="canvas" width="550" height="400"></canvas>

    <script src="glge-compiled-min.js"></script>

    <script>
      var doc = new GLGE.Document();

      doc.onLoad = function() {
        // Tell GLGE to use our canvas.
        var renderer = new GLGE.Renderer(document.getElementById('canvas'));

        // Set up the scene.
        var scene = doc.getElement('mainscene');
        renderer.setScene(scene);

        // Simple stupid render loop.
        setInterval(function() {
          renderer.render();
        }, 1000 / 30);
      };

      doc.load('scene.xml');
    </script>

  </body>
</html>
The script begins by creating a new GLGE.Document, which represents the scene. Setting the onLoad property lets you execute code once the document has been loaded, which is akin to document.onload in browsers. The handler creates a new GLGE.Renderer objects bound to the <canvas> element and initializes it with the <scene id="mainscene"> defined in the XML. A simple loop calls render(), which abstracts away the mountains of WebGL primitives required to push polygons to your graphics hardware. For simplicity I used JavaScript’s built-in setInterval(), but a better solution would be to use window.requestAnimationFrame.
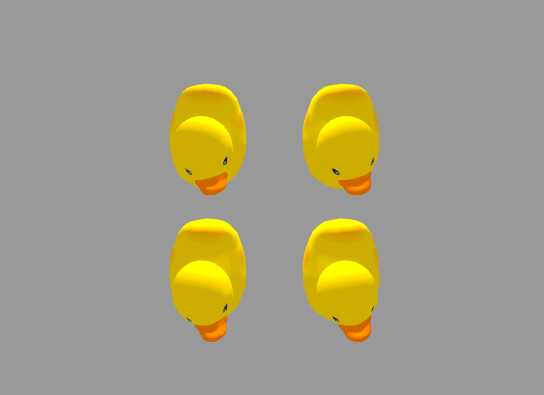
Put this all together and viola, ducks! (Check out the full source or the live demo.)
Getting animated
Animations in GLGE are easy to use and are similar to CSS3 animations: specify a duration and keyframes and the engine will tween in between them.
Let’s have the ducks bob back and forth as if they’re floating in water. A simple bob back-and-forth is a little boring; anyone who’s ever tried to balance on a raft in an lake knows that movement isn’t limited to a single axis. In addition to the lateral wobble the ducks should also bob forward and backward a little. In GLGE XML, this type of animation can be declared like this:
<animation_vector id="bob" frames="60">

  <animation_curve channel="DRotX">
    <linear_point x="1" y="0" />
    <linear_point x="15" y="-.2" />
    <linear_point x="30" y="0" />
    <linear_point x="45" y=".2" />
    <linear_point x="60" y="0" />
  </animation_curve>

  <animation_curve channel="DRotY">
    <linear_point x="1" y="0" />
    <linear_point x="15" y="-.1" />
    <linear_point x="30" y="0" />
    <linear_point x="45" y="-.1" />
    <linear_point x="60" y="0" />
  </animation_curve>

</animation_vector>
This declares a sixty-frame animation with the ID of bob. It contains two subelements which each specify an object property to manipulate and a line along which the property’s values will be set over the course of the animation. The properties here are DRotX and DRotY which, set the object’s rotation along the X and Y axes relative to its starting rotation (the values of the rot_x and rot_y attributes in XML).
When attaching animations to objects in the scene you simply need to refer to the ID in CSS-selector-like syntax:
<collada document="duck.dae" animation="#bob" ... />
<collada document="duck.dae" animation="#bob" ... />
<collada document="duck.dae" animation="#bob" ... />
<collada document="duck.dae" animation="#bob" ... />
And there you have it — bobbing ducks!
Unfortunately, all of the ducks bob in perfect sync, which appears unnatural unless the ducks are training for synchronized swimming. It would be more fun if all of the ducks moved independently. Making that happen is a perfect task for the GLGE JavaScript API.
Intro to The JavaScript API
The XML declaration is great for setting the initial scene, but what if you want to add or remove objects dynamically or move things around? Enter the GLGE API, which lets you do everything the XML document can do and more. It’s even possible to create a scene entirely with JavaScript — no XML at all — but the JavaScript will be very verbose and feel a lot like boilerplate. If your scene starts the same way every time, stick with XML.
Regardless of how you created the scene you’ll need JavaScript to manipulate it. In the case of our ducks, we created the scene and animations using XML, but to make the ducks bob independently we can use JavaScript.
First, we can modify the XML to give each duck a unique ID, which will make retrieval using doc.getElement() easy. (Alternatively we could use doc.getChildren() and traverse the scene graph, but that’s kind of overkill for this demonstration.)
<collada id="duck1" document="duck.dae" animation="#bob" ... />
<collada id="duck2" document="duck.dae" animation="#bob" ... />
<collada id="duck3" document="duck.dae" animation="#bob" ... />
<collada id="duck4" document="duck.dae" animation="#bob" ... />
One way to do the animation would be to create four different <animation_vector>s, but that’s not very scalable if you have a hundred ducks on the screen. An easier way is to adjust the animation’s current frame by setting the object’s animationStart property, which is a timestamp of the start of the animation. Adding some amount of random offset to the timestamp will adjust the current frame of animation:
// Animate each duck individually.
var i, duck
for (i = 1; i <= 4; i++) {
  duck = doc.getElement("duck" + i)
  duck.animationStart += Math.floor(Math.random() * 1000)
}
And there you have it - four ducks moving independently! (See the live demo.)
Next up…
This should have give you a taste of how you can use GLGE to build a basic 3D scene and add a little animation. If you want to learn more, check out the GLGE home page and the GLGE examples directory for more demos. Don’t forget to play the game, too!
In part 2 of this series I’ll cover more details of GLGE in the context of the game as well as how I used Backbone to build game logic. Stay tuned.