At Legoland California this past summer I rode a Lego-styled ancient Egyptian adventure ride where you travel through a tomb and shoot as many snakes and mummies and things as you can with a laser gun. Two things occurred to me while riding: the fact that Legoland thought it a good idea to equip kids with lasers, and the thought that I could make a shooting gallery game like this that people would like.
Making games is fun. Games are the reason lots of people get into programming, including me. Some people even make a profession out of them. Even though this was months before Halloween, the game that appeared in my mind was a fun, shoot-em-up carnival-style game, and maybe I could inspire a few kids with software and hardware along the way.
But this wasn’t just a “this will be fun” idea. I’ve noticed a pattern about myself and it’s been the basis of many of my projects or even companies. I see bits of technology and how they fit together, especially those that have become recently available or economical. If the result is novel product or game that nobody else has created before, I’m locked in, and I tend to not shut up about it.
In this case, I had recently learned about inexpensive programmable microprocessors, particularly the ESP32, and I finally had an excuse to get into rudimentary electrical engineering. I was stunned at how cheap and accessible electronic components had become, and the online learning resources seemed infinite. I googled around and couldn’t find anything too similar to what I wanted to build, and thus this goofy and fun idea took hold.
What the heck is ESP32?
One of the greatest fears as a homeowner is uncontrolled running water. A great product to deal with this fear is Flume, an internet-connected water meter that gives you reports and alerts you to leaks. Flume had recently informed me that my old unit was defective and sent me a free replacement, so naturally I took apart the old one to see what was inside. Made of two components, a reader and base station that communicate wirelessly, opening them revealed that they were powered by a versatile, programmable chip called ESP32.
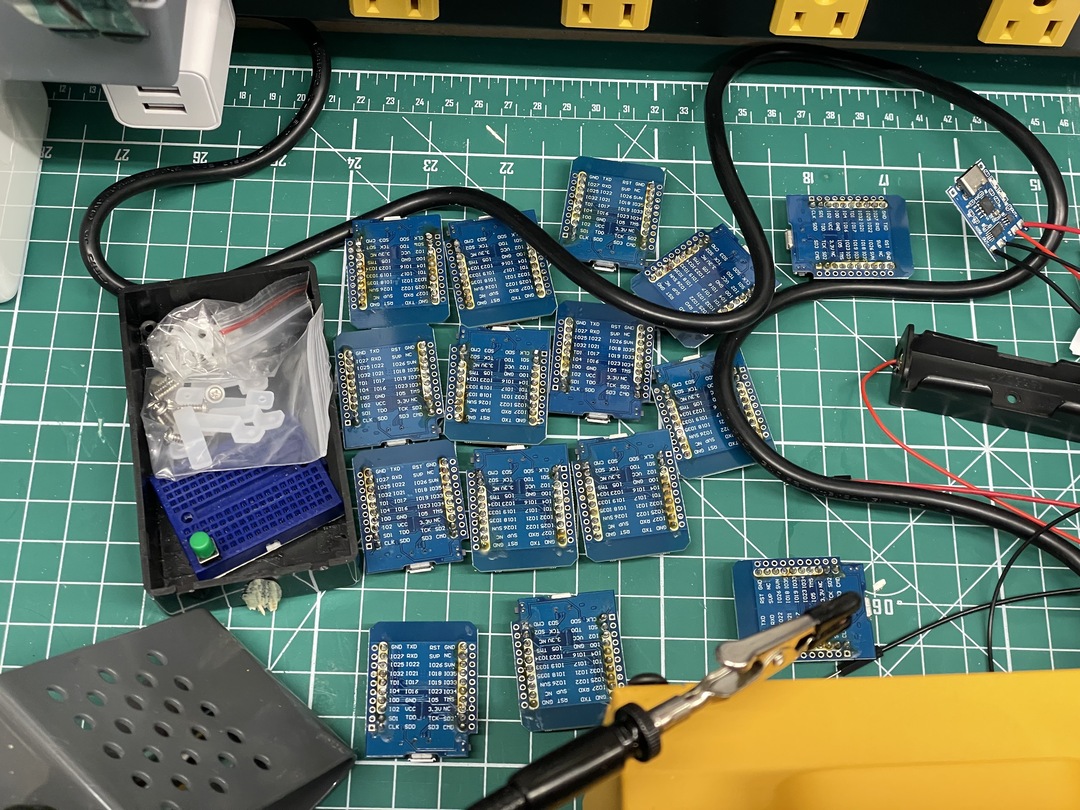
As someone who hadn’t been following makers, Arduino, or any kind of hardware, the ESP32 platform was astounding. It has a dual-core CPU that runs at up to 240 MHz, it can do wifi and Bluetooth, and it’s got about forty pins that can be used for all sorts of stuff. You can program it with the free Arduino IDE and a USB cable, and they cost about $6 per board. For someone who wanted to experiment efficiently and knew that they’d probably set one or two prototypes on fire, this was perfect.
I watched a lot of videos on electronics basics and Arduino and figured out what I’d need to buy to start learning. Initially I bought a single board and some LEDs from SparkFun, which is a popular site, but the lengthy ship times made me impatient. I turned to Amazon — yes, I’m sorry — where I could get components much more quickly and cheaply, and spent a few dollars on a few ESP-WROOM-32 boards and a breadboard starter kit. Learning the Arduino IDE was pretty quick, and before long I had some LEDs blinking and was reading infrared signals from a soundbar remote I had lying around.
The game started to solidify in my head, and the idea of zapping aliens seemed reasonably fun. I decided to create Among Us-style characters for the target faces since every kid loves that game (mine do) and the characters are very recognizable. So I decided to build out the first version of a Node.js game server with a web-driven scoreboard, and I had the ESP32 target connect to my wifi and communicate “hits” over UDP:
Moving to MicroPython
While working on the game I used my newfound ESP32 skills to do some other projects, such as automating the remote-controlled blinds in our bedroom as well as a motion sensor that would send Pushover notifications to my phone. I started to run into issues with keeping time and went down rabbit holes of using NTP and DS3231 realtime clock modules. Online friends convinced me to look at MicroPython1, which seemed to have a better ecosystem than Arduino, so I switched.
I was hesitant to switch to MicroPython because I wanted to stay low-level and better understand the hardware. But I quickly discovered that iterating with MicroPython was much faster. Python is a much easier language to work with, of course, but the real win was that there was no compilation or flashing step. In theory, you simply copy files to the board and reset it with the mpremote command. This was mostly true, but watching main.py for changes, copying the files, and monitoring the serial port for output gets cumbersome and buggy, so I built a tool to automate this. It worked most of the time but still occasionally required unplugging and reconnecting the board.
The switch to MicroPython really paid off later when I started using uOTA, an over-the-air updater framework. By hosting a tarball on my laptop and sending the targets an “update” command, I was able to update all 15 devices wirelessly without connecting them via USB. More on that later.
Infrared
Sending and receiving infrared (IR) signals with microcontrollers is well-documented with a handful of protocols. After some experimentation I found all of the remotes I had used NEC, which basically sends one long pulse, then a space, then bits of data with some simple error checking.

NEC infrared remote control signal protocol from Explore Embedded
The IRremote library for Arduino is great. It’s well-documented, has lots of examples, and decodes the IR protocol automatically. Even though I didn’t use it, one of the best features is how it creates a 4-byte hash of any incoming IR command, which makes it trivial to check for button presses on an IR remote.
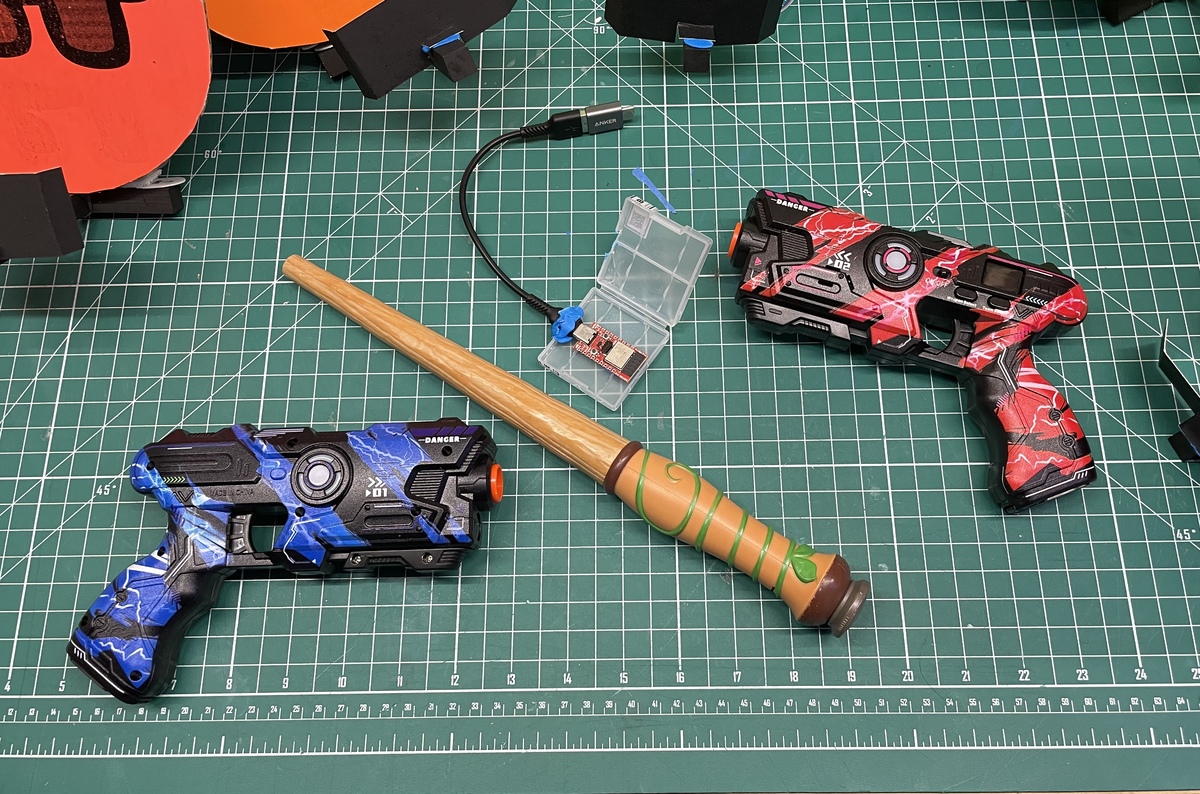
For inputs, I was definitely set on using the cheapest IR laser tag guns I could find, which use IR despite being called “laser” tag. I also had an “MagiQuest” wand from a local water park with a definitely-not-Harry-Potter game where you wave a wand to collect points. Importantly, I felt the wand would be more appropriate to use the wand at a school event.
Neither the pistols nor the MagiQuest wand used any known protocol2, so I had to parse the raw timing data and look for patterns there. I discovered that there was a particular tolerance needed when decoding an IR signal as they tend to get more corrupted or “wrong” the farther away you are and how accurately you’re aiming the transmitter at the receiver. I assume IR signals are bright and bouncy to allow the changing TV channels from a hundred feet away, but other than that I haven’t really researched the physics as to why this happens. Regardless, I was able to use this property to more accurately detect hits from the laser guns and wands.
Around this time I also switched to MicroPython and began using Peter Hinch’s micropython_ir libraries. I decided that a 1 bit was any burst longer than 750µs for the laser guns and 500µs for the wand. The entire receiving code ended up looking like this:
# `burst` is an array of IR pulse lengths
bits = ""
if burst[0] > 1200 and burst[0] < 1800:
  # Laser gun
  for i, value in enumerate(burst):
    if i == 0:
      continue
    if i % 2 == 1:
      bits += "1" if value > 750 else "0"
else:
  # Wand or anything else
  for i, value in enumerate(burst):
    bits += "1" if value > 500 else "0"

# Wand is acting strangely. Trim any leading 10+
bits.replace("1" + "0" * (len(bits) - len(bits.lstrip("0"))), "", 1)

if len(bits) == 20 and bits[:8] == "00001111":
  print("hit (pistol)")
  handle_hit()
elif len(bits) >= 12 and bits[:12] == "100101010101":
  print("hit (wand)")
  handle_hit()
else:
  print(f"unknown IR signal: {bits}")
Lighting
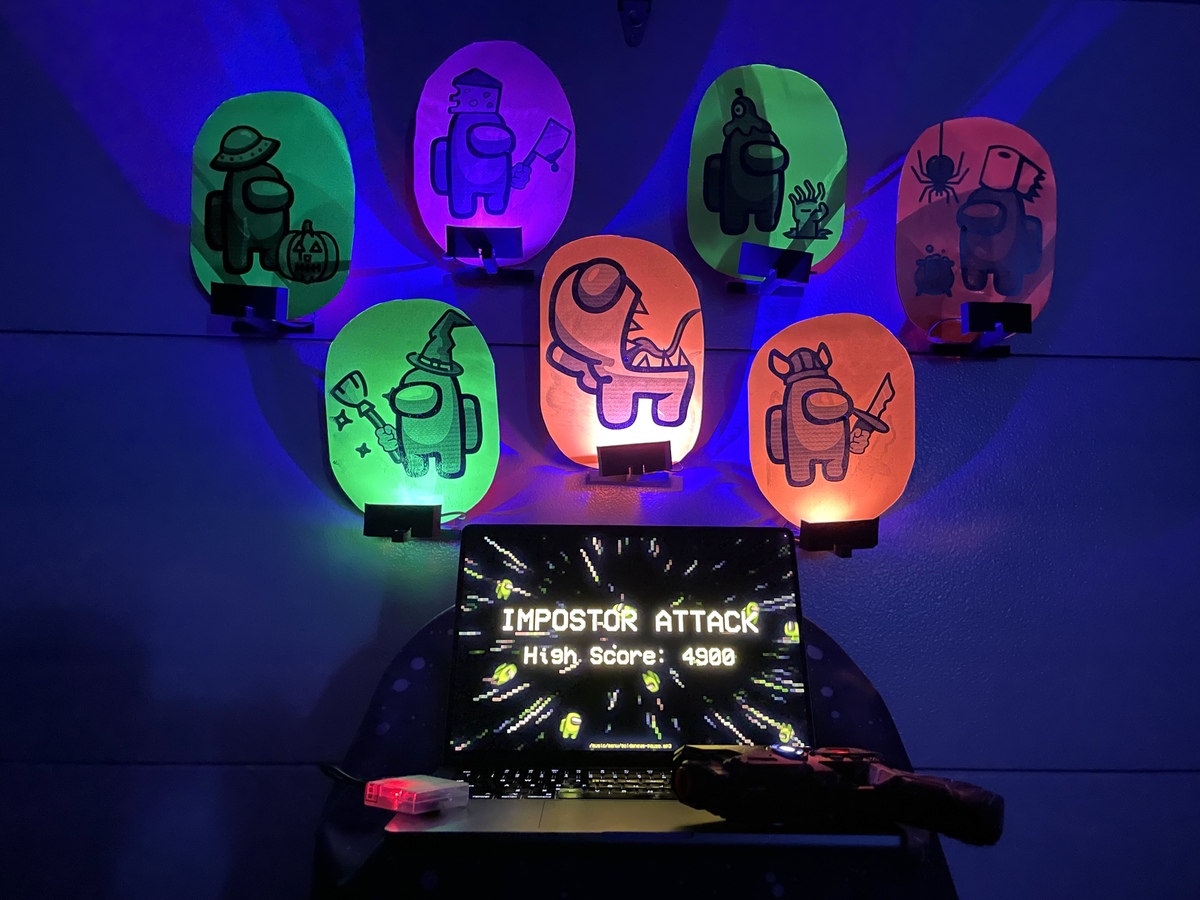
My vision was to have 10-15 targets that, once the game started, would all light up at random intervals to signal that they were ready to be shot. I wanted the targets to flash if shot, but also flicker and turn off if the player didn’t shoot them as it’s a common mechanic in platformer games to flicker and remove items if they’re not picked up in time. Since this game was going to be played by kids on Halloween, I figured that UV (blacklight) against neon paper would fit the spooky motif. Thus, I needed two LEDs: one UV for the “ready” light and something else for the “shot” light.
One of the first real challenges I had was figuring out how much light I could produce with an ESP32. The GPIO pins produce 3.3V, but the maximum current is a little mysterious even though the datasheets say something like 40mA. I really wanted to drive the LEDs right from the board and avoid any extra components to keep things simple and reliable. A relay or step-up voltage converter would mean lots of extra soldering for fifteen targets, and another part meant another thing that could fail.
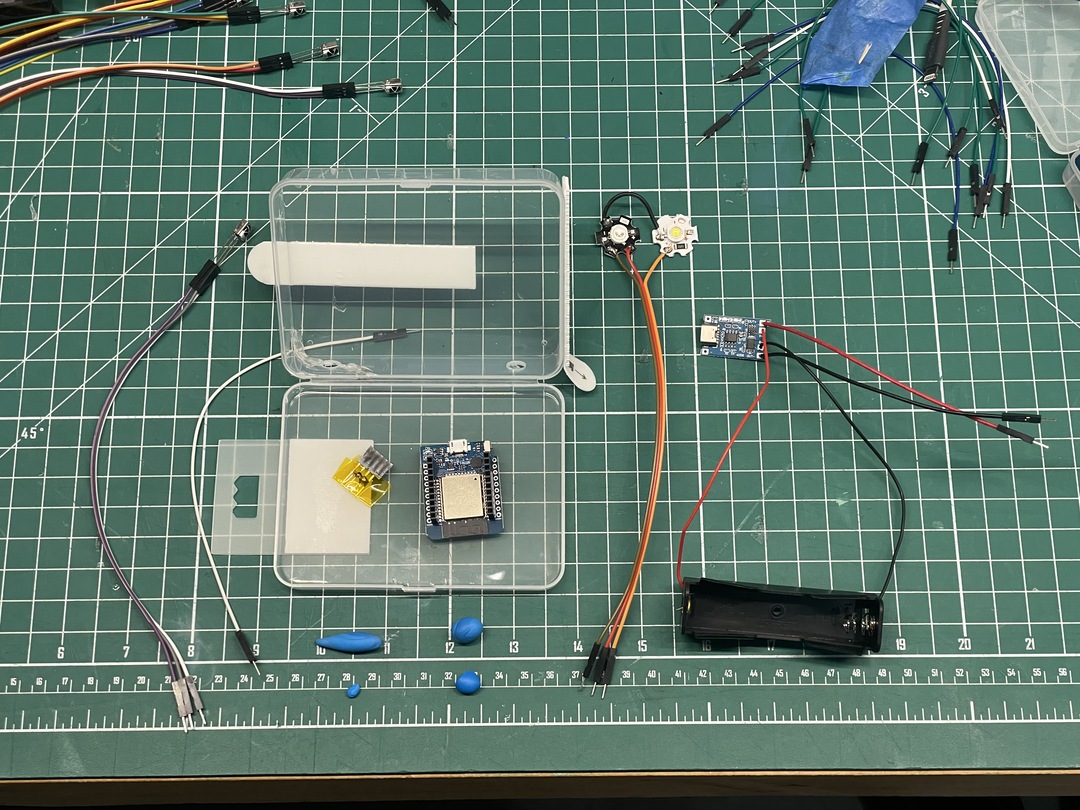
I ordered a few different types of LED components to experiment with and decided that 3W 420nm UV and 1W white LED “lamp chips” would be sufficient as long as the LED was oriented correctly. I made a prototype with a little stalk to angle the LEDs properly and a little tin foil reflector to help add the light. The reflector doubled as a shield to prevent me from looking at the UV light, which left yellow spots in my vision for a few minutes. I’m sure that that’s totally safe.
Glow-in-the-dark paint didn’t look nearly as cool as I thought it would
This was before I discovered the world of RGB lighting and WS2812B strips, which I’ll cover in a later post when I talk about my holiday lights project. In the future, I might use one or more 5V WS2812B LED lamp chips which, in theory, could be driven using the full 5V from the power supply and controlled via a data pin. Noted for next year!
Power
Power was another big question. I wasn’t sure whether I should keep each device plugged with long USB cables or use battery power. Long cables meant I wouldn’t have to worry about battery life and swapping out batteries during an event, but I also imagined a tripping hazard, and I worried about voltage drop. Instead, I decided to give batteries a try.
I learned about the ubiquitous 18650 li-ion “flashlight battery”, a form factor that is apparently in everything rechargeable from power tools to Teslas. In fact, I already had a few left over from when I fixed the battery pack in a handheld vacuum cleaner. Since they’re unprotected and can cause fires if overcharged, undercharged, or looked at menacingly,3 a charging and discharging protection circuit is necessary. Luckily, TP4056 charging modules are cheap and abundant.
With power figured out, my prototype was now complete hardware-wise.

Once the charging components arrived, I made a prototype of my first battery-powered self-contained ESP-NOW powered target and it worked! The only glitch was that the TP4056 required a repeat insertion of the battery. It seemed like something needed to be powered up for the charging component to activate, and only with the second battery insertion did they begin to provide 5V continuously. The modules were meant to drive USB battery packs, so I’m guessing this behavior is related to that somehow. In the future I’ll either add a power switch to make the process easier or I’ll find a way to circumvent it completely.
Communication
I was still worried about power consumption, and this led me to discover ESP-NOW, a UDP-like 2.4 GHz communication protocol available on ESP32 systems. Not connecting to wifi sounded much more efficient since the CPU wouldn’t need to waste valuable cycles and energy processing packets and such. Also, I was already disappointed to find that UDP retransmission was necessary even on my private and quiet home network. The only downside was that I would need yet another ESP32 plugged into my laptop to act as an ESP32-NOW bridge.4
When manufactured, each ESP32 gets a unique MAC address. I was already using this as a device identifier when communicating over UDP, so converting the code to use ESP-NOW was simple. I used an extra ESP32-C3 I had ordered since it fit nicely into a plastic battery box and could stick to my laptop with blue tak. Testing them demonstrated communication distances of over 200 feet without retransmission, which was impressive. ESP-NOW became an easy win.
I wasn’t finished with wifi, though. I plumbed in uOTA, a MicroPython framework that does over-the-air updates over wifi, and updated the targets to only connect to wifi once they received a special “update” command over ESP-NOW. Once connected, they would check for updates from a web server running on my laptop with a fixed IP, update themselves, and reboot. This ended up working perfectly, and later it became the primary way I made changes to the target code.
More target work
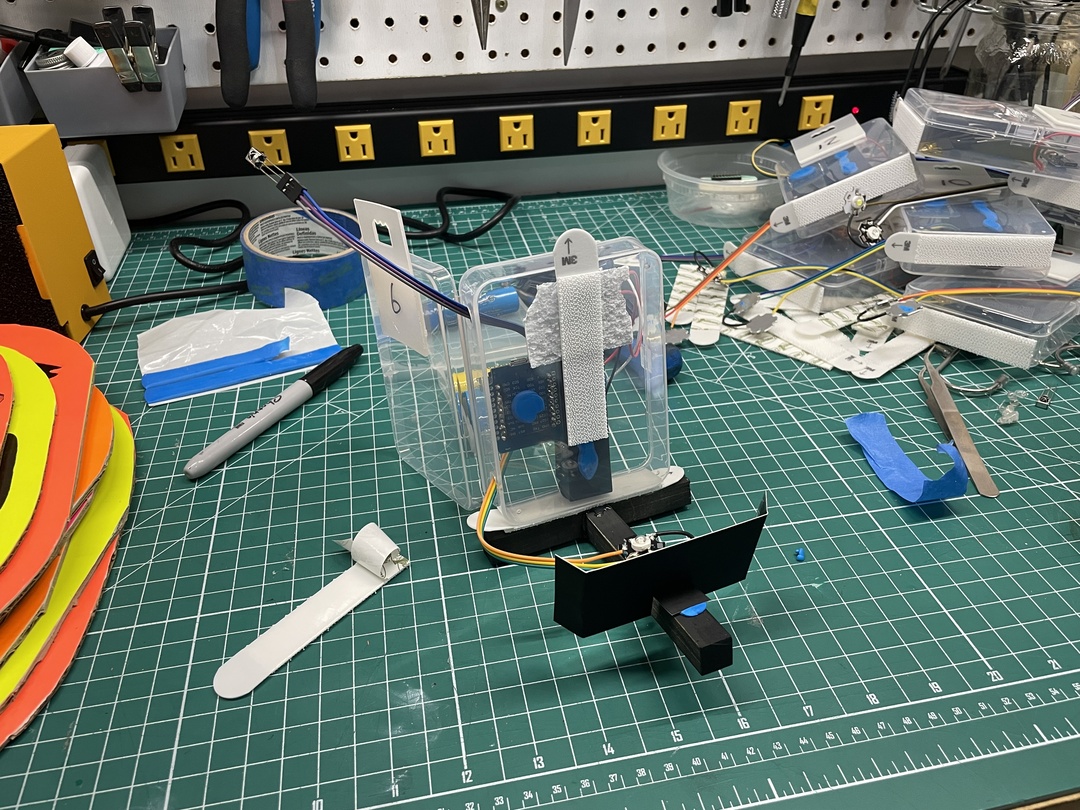
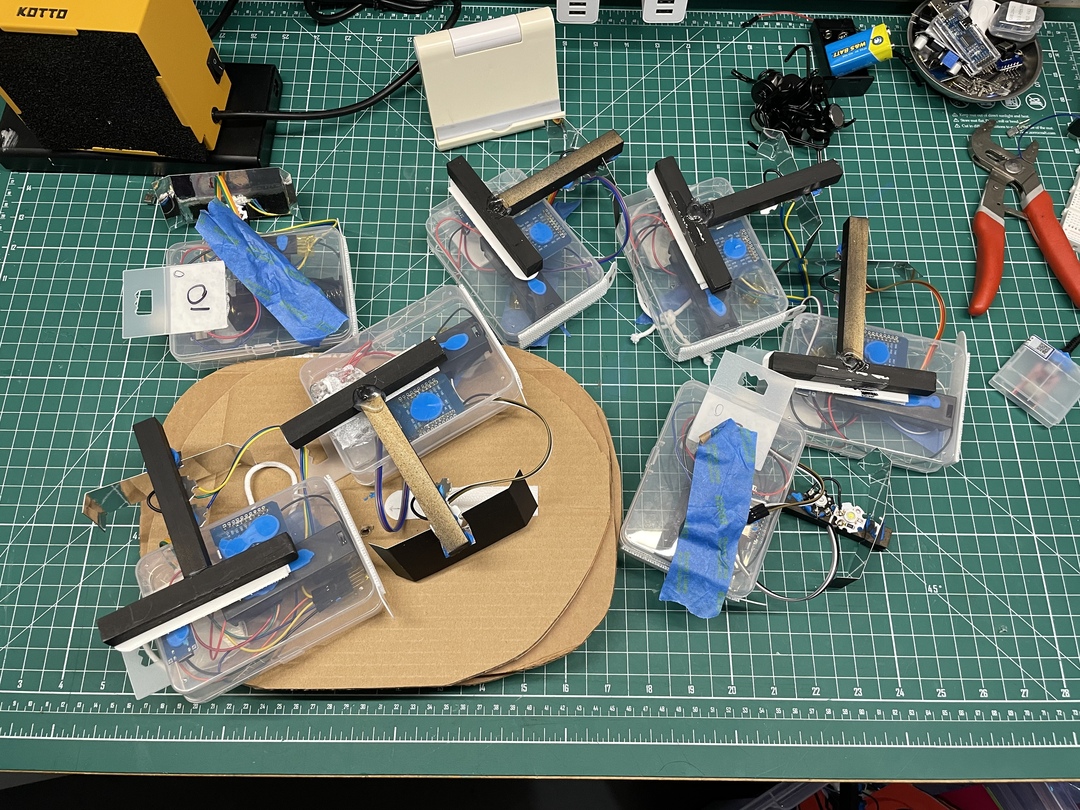
With the prototype working, I thought carefully on how construct fifteen of these targets in the most foolproof, reliable, and easily-debuggable way. I decided on the following:
- 18650 li-ion batteries with holders and TP4056 charging modules as the power source
- D1 Mini ESP-WROOM-32 boards since they were the cheapest and, not having any header pins soldered, the most versatile
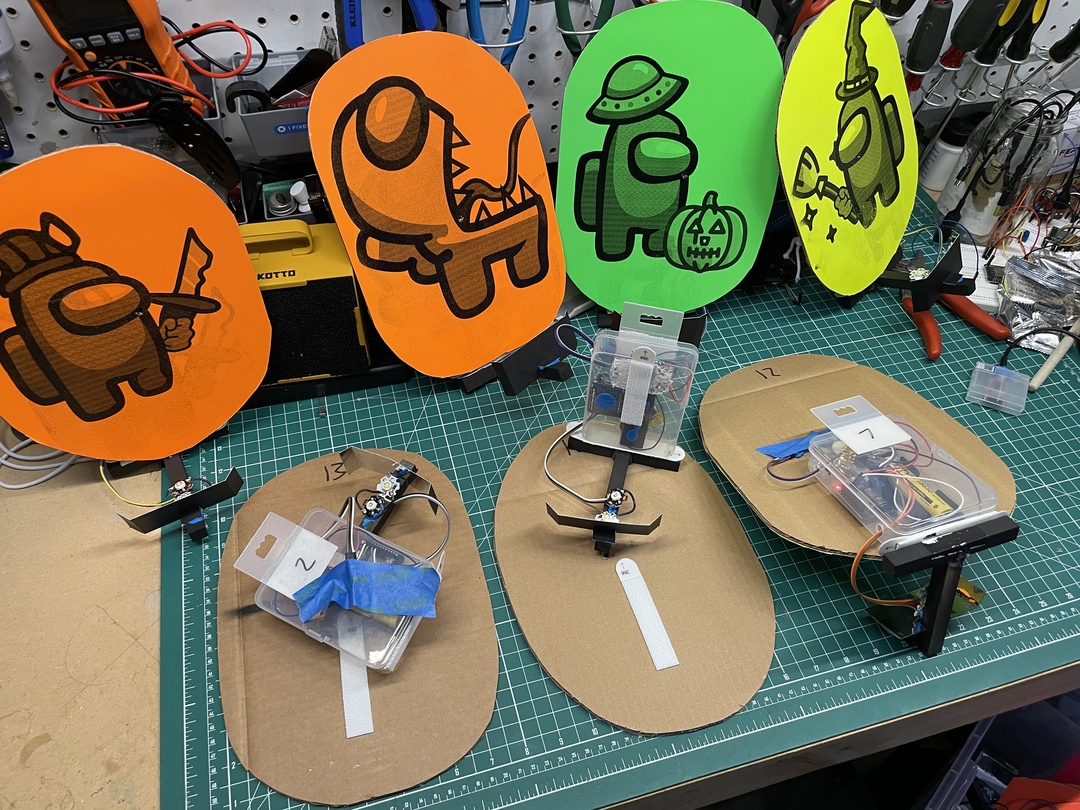
- Neon project paper on which to print the target faces, spray-gluing them to cardboard to make them sturdy, and punching a hole with an awl for the IR received to peek through
- Small pieces of mirror paper to act as reflectors
- Clear plastic storage cases to protect the components and make handling easier
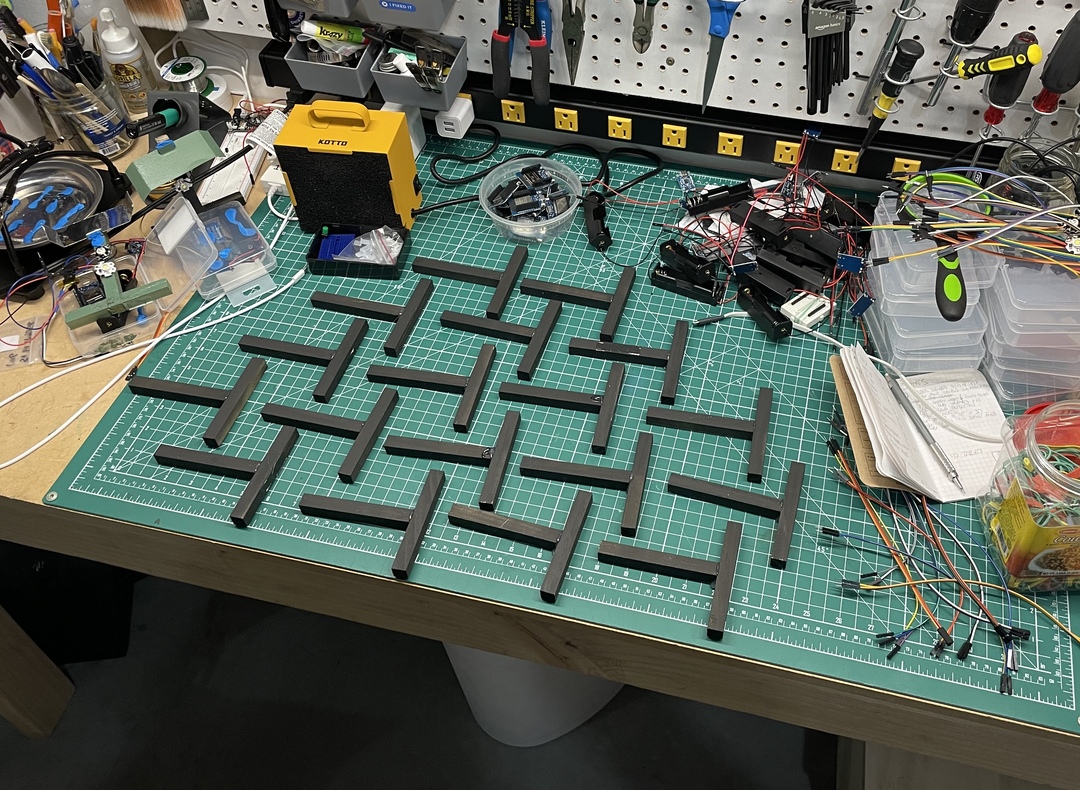
- Simple wood T’s, black spray paint, and hot glue as a frame
- Blu-Tak putty to stick components to the case and frame
- 3M Command Strips (like velcro) to stick the case to the frame and the target to the case
- Stick-on hangers so the targets could be hung easily, such as with strong magnetic hangers on a garage door
- Dupont jumper wires (1, 2, 3) instead of soldering in order to make service and assembly easier
- My own 4- or 5-pin jumper bridges created from soldering extra headers as a common ground
Making the targets modular — a case, a target face, and frame — let them be easily constructed and serviceable. With the command strips, if a target face seemed off-center or unbalanced, I could take it off and reposition it. Also, all of the targets packed up neat and tidy in a box when no longer in use.
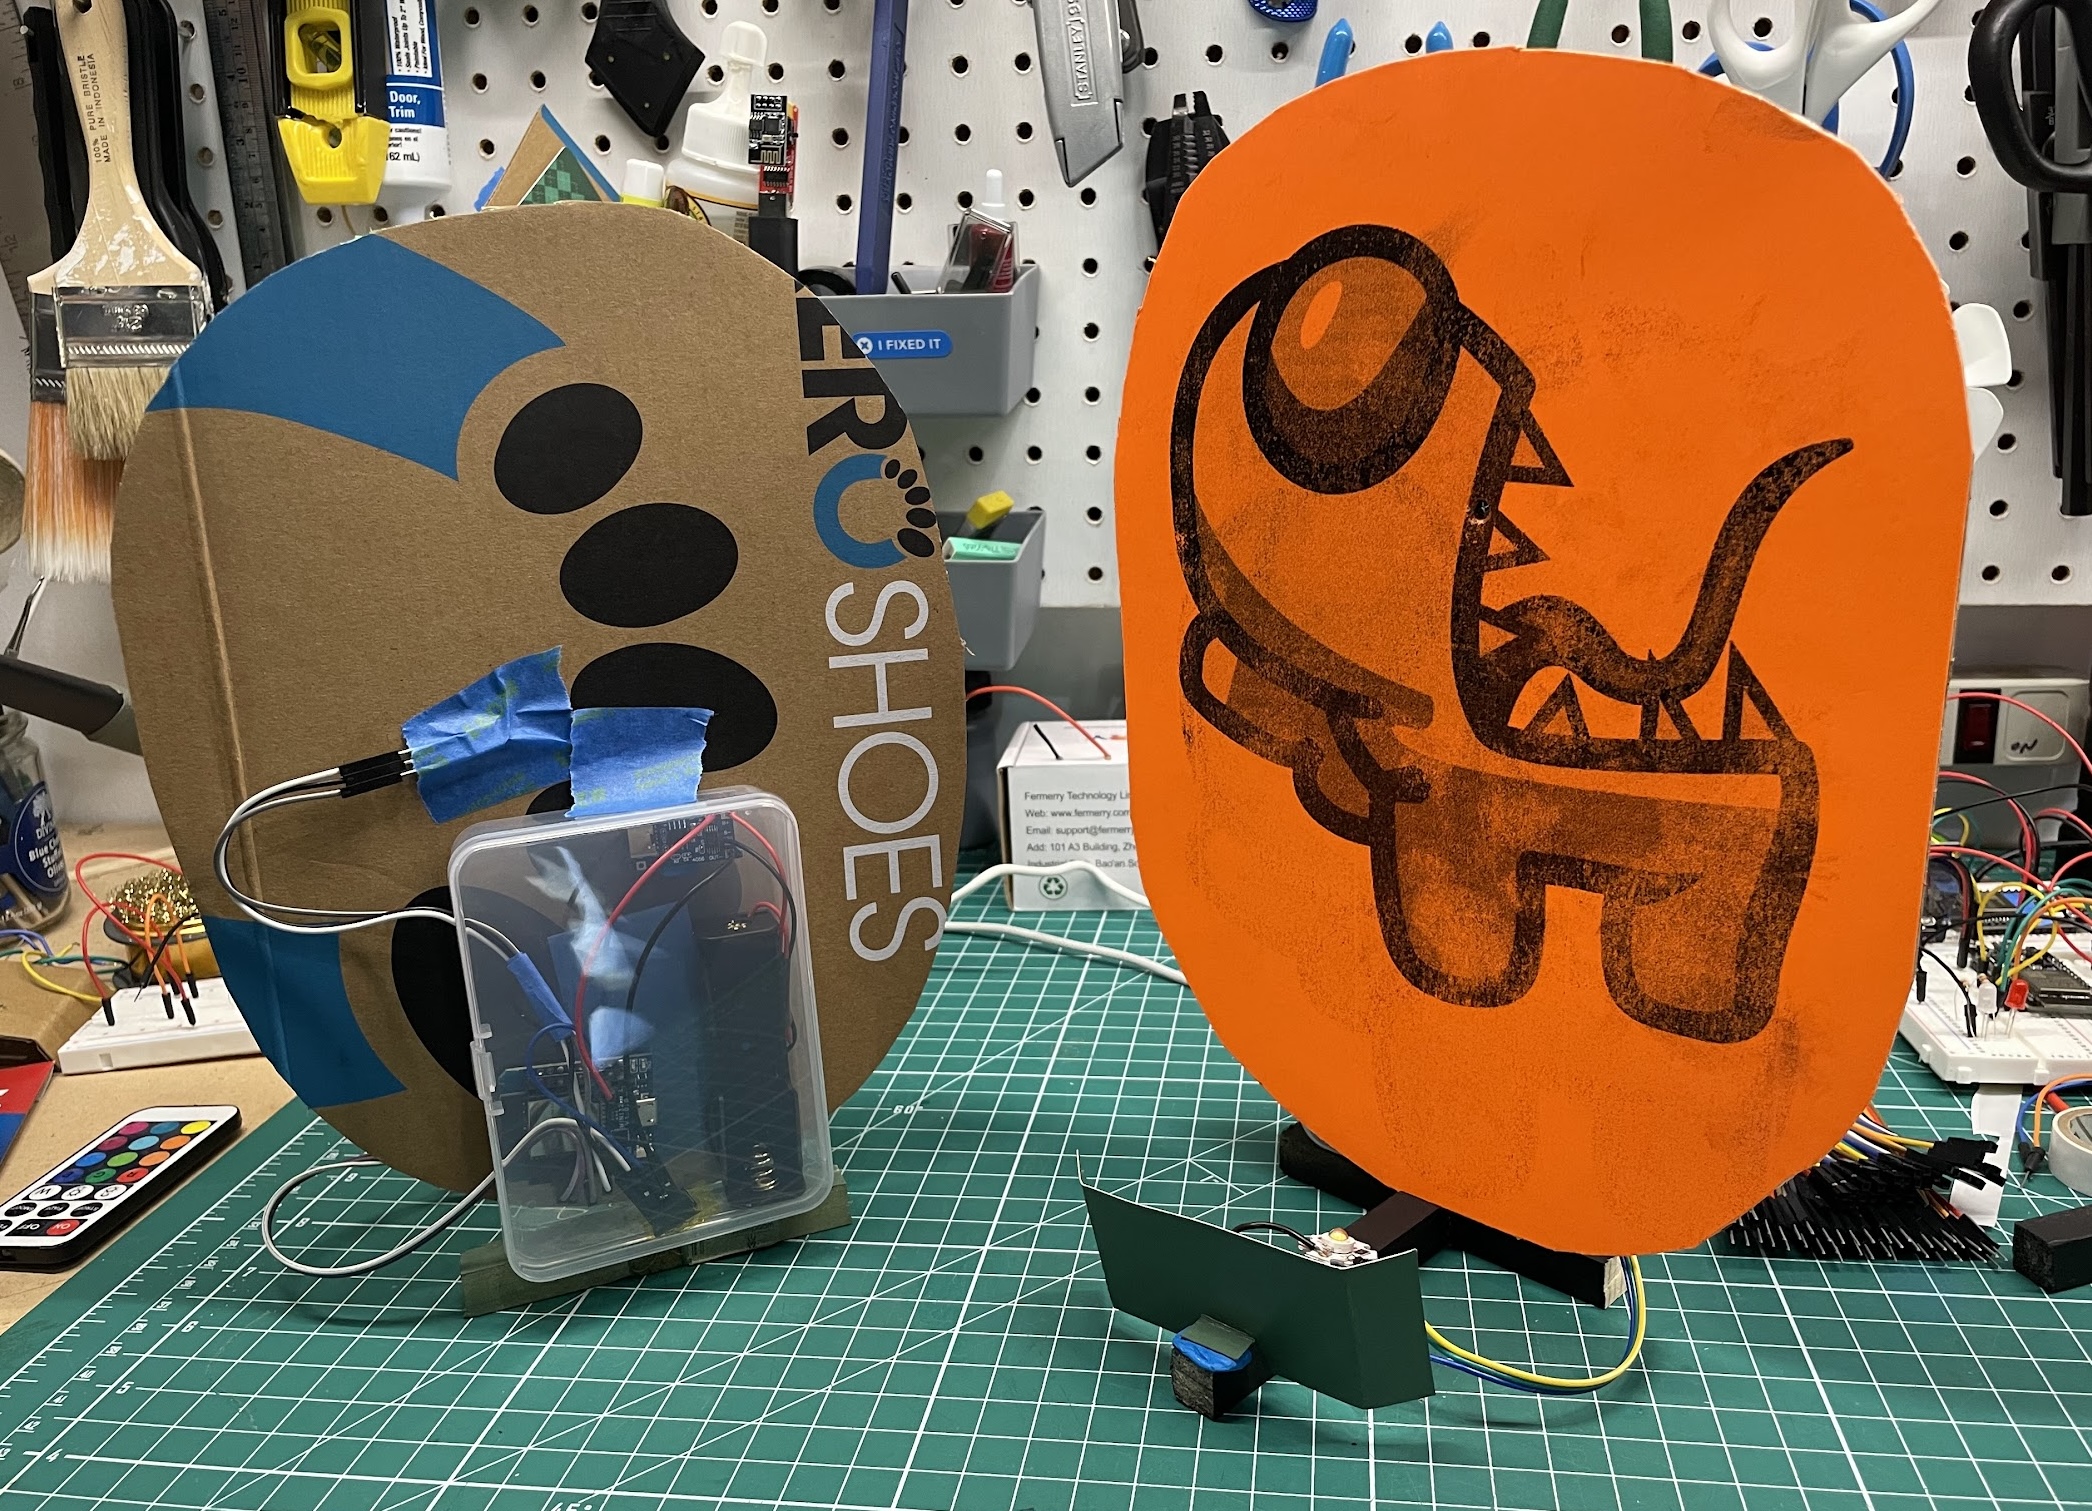
Using Dupont jumper wires for everything had mixed results. On one hand, I liked the idea of making the ESP32 boards reusable. On the other hand, jumper wires tend to work themselves free, and I ended up adding blu-tak to all of them. Also, the project boxes weren’t quite tall enough, so repeated pressure from handling and inserting batteries tended to knock the wires loose. Despite this, everything mostly worked, and figuring out why something wasn’t working was usually a matter of fixing a loose connection.
Using some Among Us clip art and a Halloween icon pack, I made fifteen graphics in Figma to use for target faces. I wanted to use a local shop to print the targets but, for some reason, couldn’t find one that would do it. One shop owner said to just use my own laser printer with the “thick paper” setting, which is what I did. Some neon paper colors held toner better than others, and all of the target faces had some amount of ghosting. The toner also tended to rub off after printing, so every print was sprayed down with aerosol Minwax polycrylic to seal it up.
After a few nights of doing everything 15-20 times (I needed redundancy for every step of course), I had fifteen working targets ready to go! I strung up some rope in the garage and hung them all for easy testing.
The final idea to implement was a “boss” target that would have special sounds and take more hits to destroy. Originally I had intended the boss target to be bigger and scarier, but since I had to print the targets myself I settled for a unique face and just told players which target was “special.” Since I didn’t want to have a unique version of the code for bosses, I designated a single pin as a pull-up resistor which the code could read to determine whether it was a regular or boss target, and on the special target I connected that pin to ground.
imposter_pin = Pin(16, Pin.IN, Pin.PULL_UP)

# ...

def is_imposter():
  return imposter_pin.value() == 0
The big day (or days)
The first trial run was at our elementary school’s “Trunk or Treat” event, where people parked cars at the school and made Halloween-themed exhibits.

Everyone had a blast! About 115 kids played, with a few making second or third attempts at breaking the high score. I was told that I had the second biggest crowd, second only to a Pokémon bean bag game (which did look pretty cool). Some adults were curious, but most importantly, a handful of questions from kids who wanted to know how I built it. It was especially rewarding to show one off one of the extra targets I brought. One kid even recognized the ESP32 chips and said, “Oh, these are the ones you can make drones out of!”
Halloween, however, was the big show. I set up a table in front of our garage and used [magnetic hooks] to mount the targets, of which only 13 were working. Having learned from the event at the school, I taped off a line for people to stand behind so they’d have the best chance at shooting the targets. I also added a counter to track how many games were played, and it came out to almost 90. A handful of people came back to try and get the high score, which I think was around 5,200.
Improvements for next time
People really liked the game, and I’ve set it up a few more times for other events. However, there’s a host of improvements that need to be made to make the game more fun and reliable.
- An on/off switch — Popping batteries in and out was a lot of toil because the targets were so fragile.
- Better target faces — Surely I can find a local sign shop to do coroplast signs. And I might try a different theme than Among Us.
- Better lighting — WS2812B LEDs might be the solution since I can drive a few at once as well as change the colors for different effects and events.
- Custom boards — Using something like PCBWay to print my own boards might be a good idea. I could make sockets to drop the ESP32s and other components into and use headers to get rid of the unreliable jumper wires.
Until next time, please enjoy the videos. You can checkout the source code for the entire project on GitHub.
Footnotes
-
I also considered CircuitPython, and choosing between that and MicroPython was difficult. I decided that CircuitPython is more focused on pushing people into the Adafruit branded hardware ecosystem, so I stuck with the more organic-feeling MicroPython. ↩
-
There does appear to be a project where someone decodes the wand ID and shake magnitude of MagiQuest wands with Arduino. ↩
-
The biggest problem with 18650 batteries appears to be their design. The negative pole makes up most of the case while the positive “button” is a thin cap at the top. The gap between the two parts is small, so if they get dropped or damaged in the right way, those terminals can touch. This leads to thermal runaway, scary moments, and insurance claims. ↩
-
Maybe there’s a way to send ESP-NOW packets from a regular wifi NIC, but I couldn’t figure this out. Wireshark can sniff ESP-NOW packets, though, so maybe? If you know, let me know. ↩


